Exploiting the varying amounts of Infrared light that different objects give off leads to dramatically coloured shots. In this part of the series I’ll take you through how I post processed a recent pic taken on a Flickrmeet.
First things first. If you shoot RAW be prepared to have to make a side step before beginning the the processing. If you followed the previous article and shot with a custom white balance, you will need to avoid using Adobe Camera RAW, the RAW processing tool that acts as Photoshop’s front end. This tool can’t recognise the custom white balance setting, as it will be outside of ACR’s range. The image will open in ACR as a purely infrared image. 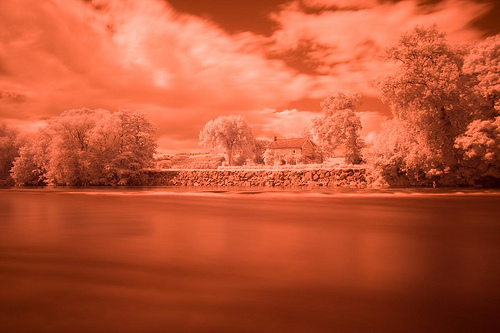
So we need to open the shot in another package first to retain the information set with the custom white balance shot. As you know, I’m using a Canon 40D, so I also have Canon’s own DPP package which, as it happens, does retain the custom white balance information. From there we can send the shot to Photoshop as a TIFF.
I will apologise to non Canon users at this point! I can offer one solution to this problem for others, which is to shoot JPG for this type of photography. This will retain the custom white balance at the time of shooting as part of the image, so no need for hassle and off to Photoshop we go! The TIFF that DPP generates looks like this :-
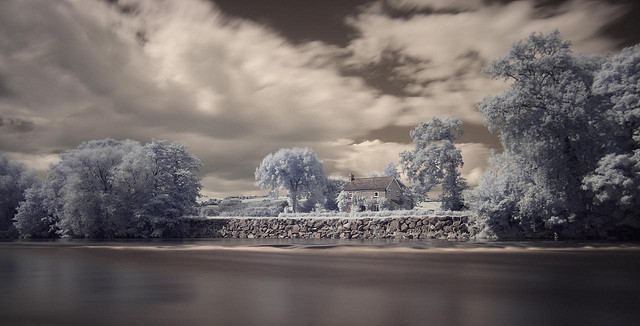
With some subjects this kind of processing works well already. Some of my other shots have a similar colour palette as it is simply the result of the custom white balance straight from DPP.
The first step on the path to trying out some false colour work is to swap the Red and Blue channels. In our image, the blueish trees will now go red(ish) and the browny red sky will end up a dark cyan, which is a bit closer to blue than murky brown!! To do this we add a new Channel Mixer adjustment layer and in the Red tab set Red to 0% and Blue to 100%. Then on the Blue tab, we set Blue to 0% and Red to 100%. After a while doing this gets really boring, so I made an Action to do it for me!
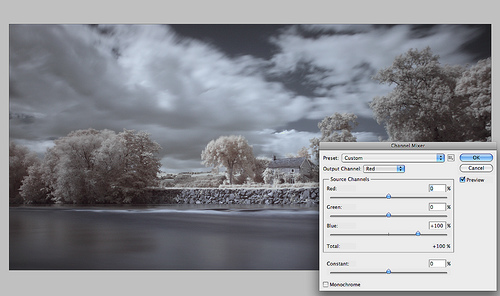
So now we can see the colours starting to appear but the image looks a bit flat and dull. Use a Levels or Curves adjustment layer and hit Auto (yeah, like you can navigate those weird channel swapped colours in manual mode? – just hit auto and tweak to taste!).
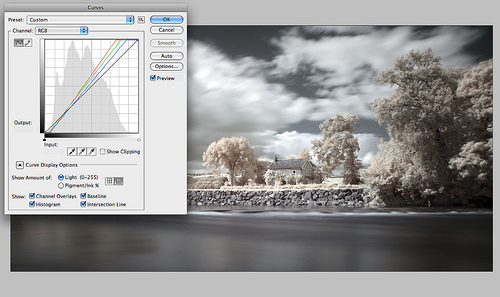
Its starting to look good now but I often then add a Colour Balance adjustment layer and tweak around a bit to get rid of either a cyan or reddish tinge.
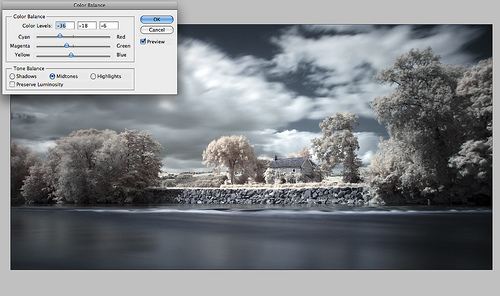
The only other steps I performed on this image was to increase the effect of the pink trees using layer masks and colour balance layers to bring out the reds here. After that I used a Selective colour layer on the line of rushing water at the bottom of the wall and made the whites a bit more white, as they had changed a bit bluey in the colour balance process.
Last step was to create a new layer, using Option (or ALT) to merge visible to that new layer, the shot was flattened and sharpened using Un Sharp Mask. IR with architectural details seems to be able to take quite a lot of sharpening to crisp up those edges without looking over the top. The house and the wall really benefitted from the process. But the same cannot be said for the wispy clouds and smooth water, so I used added a mask and painted out the clouds and water, therefore revealing the other unsharpened layers underneath.
Save the whole thing as Jpeg and off to Flickr we go!!


Thanks Steve, you are awesome!!!!!!!!!!!!!
Hello Steve,
I’ve been experimenting with my Canon 40D to shoot pictures with a Hoya R72 filter. It works OK till I get to the part where you suggest to download the images fom the camera with DPP, because “it does retain the custom white balance information”. When I select an IR image in DPP there is no “custom” in my list of ‘white balance adjustment’ choises!?
So I selected the IR ‘grass’ image first and used the ‘click white balance’, ‘eyedropper’ and ‘register’ options to create a “personal WB” (1, 2 or 3). Only after that I could create TIFF-files like you mentioned. Is this the right way to proceed or did you mean something else in your description?
Thanks again for your tips sofar!
Greetings from the Netherlands,
Wimpke
Ok, yes.. good point. I can be clearer.
The RAW when opened in DPP already looks like it did on the back of the camera, so there is no need to apply any further white balance adjustment.
However if I open the same RAW in Adobe Camera RAW (Photoshop), the file loses all the custom white balance I set and just appears bright red, leaving me just to use the dropper on the grass image, as you have mentioned.
So what I see in DPP is what I saw on the LCD when I had the white balance set up with a custom shot, so no need to change it further… although some times I tweak it to get a different effect!!!
Hope this helps!
Thanks for reading
Steve
Hello Steve,
Found the problem. My Custom WB images were shot in ‘sunny’ not ‘AWB’ as you indicated. After correcting this, the images look allright on the camera display and in DPP.
Thanks again for getting me started.
Wimpke
I have set my custom white balance in my converted rebel to
a patch of sunlit grass. When I take shots now with the custom white balance everything comes out in black and white which I do not like. The filter in the camera is a 720. Any ideas what I am doing wrong? All help would be appreciated. I love your shots.
thx
bk
Hi Steve
I got a 40D that is not converted so i tried to take some shots with a custom WB and i used grass but my shots still come out all red, do you know why?
Can you e-mail me and I could show you my problem, so far everybody that shoots IR when i ask questions they just ignore me.
Thanks
Pedro
OK, there are lots of reasons .. If you are shooting RAW and processing in Photoshop then they will be red – as I explained above. If you are shooting JPEG then maybe you are not setting the white balance properly on the back of the camera – get that manual out!!
I solved the problem 😀 the problem was that the 40D you can choose the custom WB without using it, and i didnt realize that it was still auto WB and i was just choosing the custom but not setting up as custom 😛
Thought that might be it… It is a bit confusing!
http://duchovny.deviantart.com/art/This-way-110657827
This was my 1st shot today, i dont think its that bad, and the weather wasnt great, and my post processing its not very strong…
Looks sweet! Congrats!
re a previous comment “”As far as filter goes, a friend of mine has the Cokin one, which is basically a P-Series one but is having terrible trouble with it””
Could you elaborate on this please, I was about to buy a cokin to use with my Lee filter holder.
Many thanks,
Caroline
Argghh!!! Don’t do it!!
The big problem with P type IR filter is that light leaks in from the sides and wrecks the photo.
It might be ok on a very sensitive camera like the Nikon D70 but for a regular unconverted camera where you need to do a long exposure to get the effect the Cokin is useless.
Get a screw in like the Hoya or Kood, otherwise you’ll regret it!!
Even with the screw in I have to cover the viewfinder to stop visible light leakage – image the effect with the sides of the filter holder exposed! Yuk!
Thanks very much for the advice, I’m using a 40D which from research seems to be OK but I’ll go for the screw in. I’m actually curios that the Kood filter is dark blue and the Hoya red ?
Caroline
My picture in my other post looks blue (mainly cos I shot it on the window sill on a nice day!) To the eye it looks black but if you hold it up and peer through it is definitely red.
Aaah, thanks very much for explaining 🙂
Thanks so much for the link Steve, i’m going to give this a go with some IR shots over the weekend and let you know how I get on.
You may want to add this link to your blog, very useful for those of us limited to adobe camera raw + lightroom for breaking the 2k temperature barrier.
http://mbignell.com/2008/07/31/getting-your-lightroom-work-flow-back-when-using-ir/
Wow, steve thank you so much. I just installed the DPP and the Image looks great now, now just playing around with Photoshop. Canon Software is useful after all. Im just experimenting at the moment, will be away out of town for a couple of days and take some shots. Will show you all the photos next week.
Again, thanks heaps
Cheers
Ronald Pramana
i have been trawling the net for hours trying desperately to understand IR and finally it makes sense! thankyou!! and to top it off you use a Canon 40D as well! very happy indeed.
Ive just been researching because i really love IR photography but don’t want to get a filter if its not going to work good.
Im new at photography, would you be able to explain what you mean by this “Even with the screw in I have to cover the viewfinder to stop visible light leakage – image the effect with the sides of the filter holder exposed! Yuk!”?? its probably something really obvious but how do you cover the viewfinder?
I agree with Carl Jones…
You need to add info on the profile editor. It’s a very small effort that will allow you to get much more work done in LR2 prior to exporting to PS for color channel swapping.
All we need is a color channel swap add-on/plug-in for LR2 and we’ll all be happy… 🙂
Hi Steve. Have been wanting to do infra red shots for some time and was tols no way with the modern digital, so I was glad when I found this article and all the help you have given others. All I got to do now is read and learn. \my first shots came out dark but Im guessing plenty of practice need. thanks for all the info. Im thinking of going for the Kood but the one that goes with the 84mm slide in job
Note see the related article to this showing how it *is* possible to process in Adobe Camera RAW.
https://stevencastle.wordpress.com/2010/07/17/processing-infrared-shots-in-adobe-camera-raw/
Thanks Carl.. dunno how it took me sooooo long to figure this one out!
Great blog! Do you want me to help you to market it?
I bought a Cokin P007 IR filter and every shot is a mess. I don’t know what I’m doing wrong. I’m shooting on a Canon 5D Mk3 with a 40mm 2.8 lens. Nothing is working in post. Anyone got any ideas?
Can you be more specific about when you say its a mess?