I recently bought an Infrared filter for my new Canon 40D in order to try out some non-visible light photography. In this first article I will attempt to explain how to capture IR shots and then in the next post we’ll look at processing methods.
The filter I bought is by Kood and is an R72 circular screw in type filter. There are various sizes – I bought a 77mm one for my Sigma 10-20mm. The Kood is a cheaper variant of the popular Hoya R72 filter.
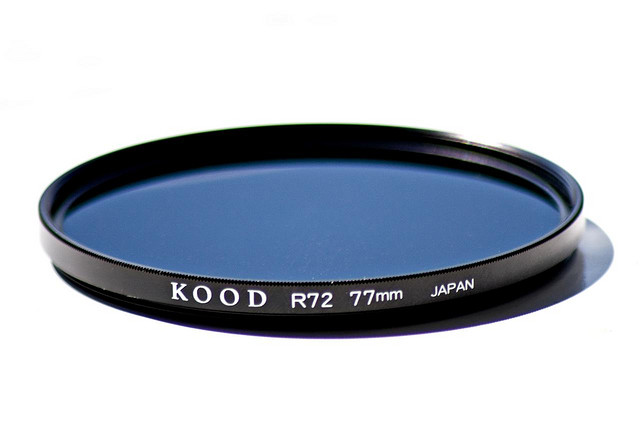
The filter is a very dark navy blue in colour and through it you can see exactly nothing!! The downside to the screw in type is that it is difficult to compose a shot with the filter on. You either have to remove the filter, compose and then put it on, or use a similar technique to night photography – Shoot a few high ISO, max aperture shots first and then stop down for the final shot.
Shooting for B&W
B&W infrared works really well for some subjects and also where there is no variety in the amount of reflected infrared light. Foliage reflects more infrared than the sky, buildings e.t.c. Black and white processing works really well for architectural objects.
The shot on the far left was taken at about 7pm with a bright summer sun shiny behind me. The water doesn’t reflect much infrared light so came out a lovely deep black. The structures have very bold contrasts too, which make the buildings stand out.
White Balance setup for False Colour
For producing colour Infrared shots the most important factor to get right is the white balance. There are various ways to achieve this in post production although none are as good as taking a shot and using that to set the custom white balance of the camera. To do this, set the camera to Auto White Balance and take a shot of a patch of grass. Defocus the lens so you don’t get too much visible grass and make sure the grass fills the frame without any shadow from you or the camera.
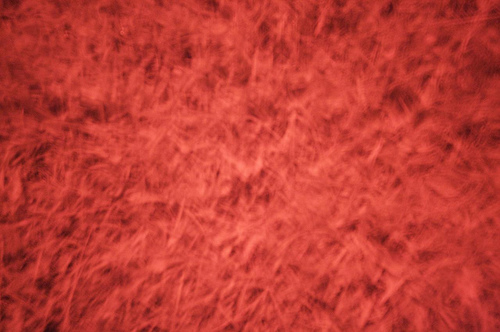
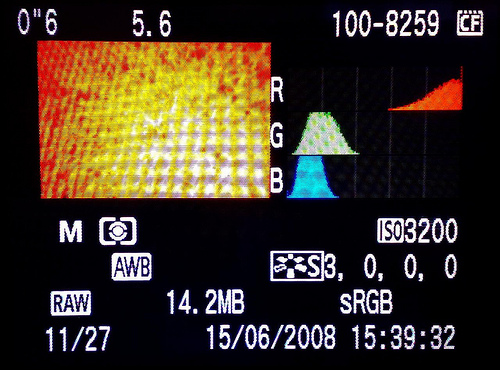
The first shot shows a white balance frame and the second shows the histogram data from the back of the camera. Note that the RED channel contains more information that the BLUE and GREEN channels and also at a different part of the spectrum. The white balance frame is the key – You can try clipping the red channel, like I have done here – which will render the foliage very white on the final exposure and also help with the relative levels of BLUE and GREEN in the final shot – which are quite important. I have also tried shots where the RED channel was no clipped and all the channel information was contained within the histogram limits. Experimentation is the key!!
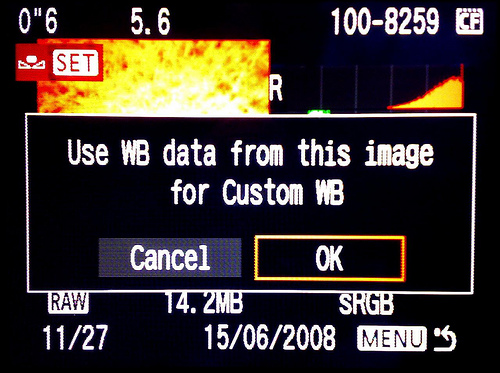
Once you have a shot, set it as the custom white balance in the camera menus. Top tip! Keep a spare memory card with some differing white balance setups and you can try them whilst out on the shoot!
Taking Test Shots
Next up! Shooting.
Manual is best, every time. The way to approach an IR shot is to use the techniques for shooting at night. Start at a very high ISO and wide open aperture, get a decent composed and exposed image and then stop down the ISO and multiply the exposure time up to fit.
Remember a halving of ISO doubles the exposure time, as does moving a stop down in aperture!
I have found that a reasonable starting point for IR on my unmodified Canon 40D with a Kood R72 IR Filter is about 2 seconds @ f/5.6 at 3200 ISO on a bright summers day. For those without 3200 ISO the same would be 4 seconds @ f/5.6 at 1600 ISO. This is a great way to set up composition, check the effects of the white balance adjustment and to gauge a decent exposure. Here, try not to clip the histogram but more likely will be the temptation to not expose enough. Make sure the image reaches both sides of the histogram… Stay at f/5.6 and 3200 ISO but tweak the shutter speed up (or down) to get the exposure. Also its best to manual focus at infinity or between 1m and infinity. Your camera may be able to autofocus through the filter but you won’t be able to see exactly what it is focusing on (!) so its best to focus far and rely on hyperfocal distance to sort you out!
The Final Shot
Once you have the setup you think is best, stop down.. So for my initial conditions of 2 seconds @ f/5.6 at 3200 ISO, that would make 32 seconds at f/5.6 at ISO 200, which is roughly good enough to do 30 secs without getting the remote release out and going into bulb mode!!
From there its 64 secs @ f/5.6 for ISO 100, 128 secs @ f/8 for ISO 100, 256 secs @ f/11 for ISO 100… so it soon mounts up to over 4 mins, just to get a reasonable depth of field! For general landscapes you can get away with f/8, if focused on infinity.
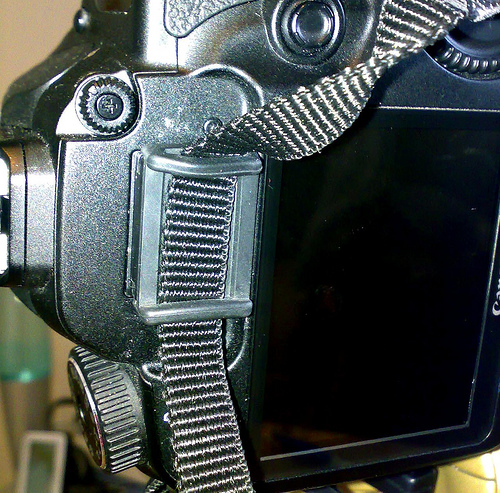
The last thing to do is watch out for the light! I usually go for a subject that has light on it with the sun behind me. This can create problems with the exposure, as visible light can get in to the camera via the viewfinder, especially if the sun is behind you.. Canon provide a viewfinder blocker on the camera strap, just remove the eyepiece and use the cover on the strap to block the viewfinder. It definitely makes a big difference to the long exposures.
Next Time..
Processing stuff! Black and white and False colour tips that I’ve found so far! Enjoy!


You are a little angel for your mega infra-red guide. Really nice stuff. Cheers Mr Steve.
hi,
I was told that I would have to modify my 40D to take infrared photos, did you have to modify your 40d, or just attach the R72? It’s an intriguing effect, but I’m not up to modifying my camera, just yet. And also, from the various makers of this style filter, is one better than another, or basically equal? Thank you for the post, it was very informative. Cheers.
@ Jim.
My 40D is UNmodified – just with the R72. With a modified camera you drastically reduce the exposure times. Effectively with my camera and just the R72 I’m looking at at least 30secs @ ISO 200 and f/5.6. Luckily I just love long exposures and the effect of motion you get, so that’s fine with me!
As far as filter goes, a friend of mine has the Cokin one, which is basically a P-Series one but is having terrible trouble with it. The Hoya R72 is generally well known but is expensive, twice as much as my Kood filter. The Kood is new to their filter line up and as far as I can see, works ok for me!
@ Luke, Cheers M’Dears!
You wouldn’t mind posting some pictures of the differences with the eyepiece cover on and off, would you? Or, you can send me some pics. That’d be AWESOME as well. 🙂
kyle.kruchok@gmail.com
Cheers!
Heh heh, I’d love to but I always delete em if I happen to forget… I’ll try and get one next time I’m out. Essentially you end up with all sorts of stage colour defects and hotspot areas – its not nice!
So you’re still getting some ‘colore’d light then aren’t you?…shooting with an un-modified camera and only a filter on the lens…
I have a Sigma and so can remove the sensor protector and shoot essentially with a modified camera and a lens (R72 filter.) I’ve tried applying your tips for false color and yes did a custom white balance setting on a full frame of unfocused, sunlit grass.
My images did not come out anything like yours.
Should I try leaving my camera ‘un-modified’ and just use the lens filter? If I modify and use a lens filter should I be planning on monochrome images?
Thanks,
Jenn
Hi Jenn, Thanks for stopping by.
Since I don’t have an unmodded camera, my only answer is ‘I have no idea!’.
From what I understand with the sensor filter removed the camera becomes more sensitive to IR so you can do the same kind of shots but without the ridiculously long exposures. You can even handhold at sensible apertures.
But I have also seen the crazy coloured pics taken with modified cameras. The most popular place for info about modified camera is over at http://www.lifepixel.com/ . These guys do the modification and have tutorials and examples you might find helpful.
Thanks. I’ll check out the link.
I have not ever had crazy long exposures and have successfully handheld all my exposures…but I’ll do some more research and leave you an update if I can determine anything.
Thanks again.
Thank you so much for this,
Im new to IR photography. I have the hoya filter few days ago and try the take some IR photography today.
I did follow all the instruction here. Im using Canon EOS 40d, Hoya IR filter, 30 secs f/5.6 ISO 100. Experimenting a few different exposure.
The results looks awesome on my Camera. However when I transferred that to my PC and open it with Photoshop and Lightroom 2, the color suddenly change to Red, all red. I tried to do some adjustments, etc but still wont give a good results.
Im not sure what I did wrong there. If someone could give me a hint that would be grateful.
Thank you in advance,
Cheers
Ronald Pramana
Hey Ronald.. Looks like you successfully made it through part 1 of the process… to get round the the ‘red’ problem, you need to read part 2!
https://stevencastle.wordpress.com/2008/07/17/digital-infrared-processing-part-ii-false-colour/
Hi Steven,
Thanks for that, I didnt realize there’s a part two lol…I will give it a shot.
I will get back to you withe the result.
Thank you so much,
Cheers
Ronald Pramana
Finally, after two hours I found someone who shows what non-converted 40D IR photos look like and how much time it takes to make them. And the results are wonderful 🙂
I thank you and will keep your blog at close hand 🙂
Hi.
ive got an opteka ir r72 and a canon 40D
i tried all the setting including yours but all i get is RED images,
ive used the filter on my canon 400 that i had before and it worked pretty good, but not on 40D
it dosent mater what type of WB i use ive tried against red green blue and all types of colors
u have any suggestion of what to do?
here is a pic from the 400D
http://mrpiraten.deviantart.com/art/Blue-old-mine-109632297
Great info steve! Really big help. I’m
wondering, what would shots of the night sky look like through infrared? I’m struggling to find anything on the Internet, so I’m guessing results aren’t very impressive. Surely outer space
must produce some interesting light outside of the visible spectrum? Perhaps pointed at the milky way?
Hey AJ, thanks for reading.
Funnily enough I have tried IR at night.
But not with the 40D. The shots detailed here are long exposures during the day at relatively high ISO at night it would be impossible to achieve.
I do however have another camera that is converted to a pure IR camera, so the exposures are shorter, I can handhold during the day. I did try this at night and the results are interesting but I haven’t fully explored the idea. One for future reference.
If I find some tips I’ll do another post….
I have a 40d and and IRShop R72 IR filter and been trying to take an IR shot for a month now, until I saw this thread of yours today. I have one question on taking that CWB, you mentioned about “clipping the red channel”. I actually didn’t get what you mean about that, and how can I clip that red channel on my camera’s histogram?….
Thanks in Advance
Hi Alex.
If you take a look at the second picture down under the heading “White Balance setup for False Colour” in the article, you can see a shot of the back of the camera and the R,G,B histogram on the right hand side.
In this shot the Green and the Blue are neatly contained within the area of the graph and have nice smooth curves, whereas the Red channel is caught against the right hand side of the graph and has a straight edge on the right hand side – as if that side of the curve has been chopped off… or clipped.
This means that some of the data in the Red channel has been lost through overexposure. This is easy to do with an infrared shot since the Red channel is always more to the right of the histogram that either the Blue or Green and so is more susceptible to ‘clipping’.
hi Steven,
Thanks for the reply, the main question is “How can I clip th Red Channel?”….What should I do to clip the red channel? Do I have to do it on my 40d?….Sorry, but I really don’t know how to do it……Thanks
I tried to take some photos from before using a CWB taken at the grass…..and it looks bad – http://s221.photobucket.com/albums/dd222/arkialex08/?action=view¤t=IMG_3625_low.jpg
but I will go out now and try your settings…I will post it it here the result…Thanks
Alex.. you *don’t* want to clip the red channel, that is the point.. you the white balance will be incorrect if you do.. The idea is to avoid clipping by making sure the red channel is nice and smooth.
You accomplish this by making sure you don’t overexpose. If the red channel is clipped, shorten the exposure.
Thanks steven,
I’ve just tried it earlier but then the resultis is still the same with that image I attached on my other reply.As far as I’ve seen with other IR photos the green areas were suppose to turn white but on my shot the green areas showed dark bluegreen and it didn’t turn into white….I don’t know what else to do, I already got a nice CWB @1/4 sec f/5.6 iso3200 (it’s almopst the same your RGB Histogram)…..I hope you can help me on getting this right.
Thanks
What’s the weather like where you are Alex? The infrared effect is much more prominent during the summer on a bright day. Especially when using a camera unconverted for infrared use. Maybe the reason you are having trouble is that the light is not right.
The image you have got looks ok to me.. you need to following the Part II article, which talks about channel swapping to get the white foliage…
https://stevencastle.wordpress.com/2008/07/17/digital-infrared-processing-part-ii-false-colour/
okay…thanks…i took the shot in broad daylight…..
I will check the part 2, and will try to get that white foliage….thank you very much, I will come back with the result
As a broke college student trying to get into this type of photography, I was wondering if you could name a couple of lower priced digital cameras that would be good in obtaining these types of pictures. Also I thought I would post a link to this gallery of photos I found of infrared shots if you or anyone else was interested in taking a look. Thanks http://enslavedlight.com/myphotography/infrared/
Hi,
Please help I tried so much to get the grass look white but it is still coming as green. I am using Canon EOS 40D with cokin infrared filter and I did all your settings but grass and trees are all coming green not white. I dont know what Iam doing wrong, please please help
I’m afraid I have no experience with the Cokin filter. Since it is a slide in type rather than a screw in, I would expect there to be more visible light leakage, which may account for the effects you are seeing.
hi .. great help on your atricle … trying to find a plce to purchase the Kood IR filter .. checked both Amazon and Ebay but none offered .. would you know where I could purchase online?
thanks
I got mine from 7dayshop.com.